With a sound understanding of additive manufacturing, Baltic Orthoservice can produce bespoke implants accurately and improve the quality of treatment for patients.
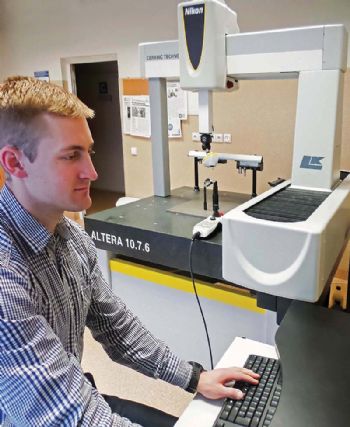
To ensure the quality and accuracy of its products, the Lithuanian company uses a multi-sensor co-ordinate measuring machine with a laser scanner in conjunction with a micro-CT (computed tomography) system.
This equipment, supplied by Nikon Metrology NV (
www.nikonmetrology.com), comprises: an Altera CMM with an LC15Dx laser scanner, which allows the fast inspection of 3-D printed implant surfaces and screw holes; and an XT H 225 CT system, which accurately validates the quality of internal structures and the geometrical correlation between the CAD implant model and the manufactured product.
Paulius Lukševičius, ‘engineer of mechanics’, said: “3-D printing is a complicated technology, and there is a big variation in processing parameters, so predicting the quality and geometry of printed objects is quite a challenge.
Patient-specific implants are a bespoke treatment solution, which means that the surgery must be pre-planned. To be able to execute the virtual plan, it is vital to be 100% sure that the implant geometry is exactly the same as the CAD model, and that the holes are machined to a high level of accuracy.
“To fulfil these goals, we use a variety of metrology equipment. The CMM with laser scanner is irreplaceable when we need to perform fast checks after each manufacturing and post-processing stage, especially to check spherical surfaces, bearing surfaces and hole angles.”
Unlike the standard modular hip implants that are used to treat severe clinical conditions, patient-specific alternatives are designed as single devices “with anatomically adapted surfaces”. These eliminate the risk of instability and adapt the implant to the bone, rather than the bone to the implant (there is no need to shape the bone to adapt it to the implant or use bone cement, meshes and augments).

The implants are designed using virtual anatomical bone models which are obtained from medical CT scans of the patient. To manufacture the implants, Baltic Orthoservice uses direct metal laser sintering equipment purchased in 2012.
After being 3-D printed, the implants undergo a variety of post-processing steps, including heat treatment, surface polishing and milling for the screw holes. There are a number of medical-device standards and regulations that must be met, so it is paramount for products to be of ultra-high accuracy.
With fine tolerances and strict standards to be adhered to, quality assurance measures are taken after every step, and the LC15Dx laser scanner can quickly show how well the physical part matches the virtual model.
Mr Lukševičius said: “Laser scanning and micro-CT serve two different purposes, and they excel in different areas. The CMM with laser scanner is very effective for inspecting the features and surfaces of bigger parts such as an acetabular implant, for quality control of standard products like osteosynthesis plates, and for assessing standard elements in patient-specific implants — such as screw holes or spherical shapes.
The micro-CT system is a vital tool for non-destructive analysis of the internal structure and geometry of additively manufactured components.
“Because the Quality Control Laboratory was a new project to supplement the additive-manufacturing facilities, there were no previous systems to be replaced.
“We knew what was required and compared the best technologies on the market to find the right solution. The primary requirement was to have the ability to inspect parts made from different types of material.
“The size of the working area was also important, but most crucial was accuracy.”
He says a particular advantage of the Nikon Metrology LC15Dx is its ESP (enhanced sensor performance) technology, which gives it the ability to scan reflective and multi-material surfaces, while maintaining accuracy, speed and data quality by ‘intelligently and continuously’ adapting the laser settings for each measured point.
Probing error is comparable to that of tactile inspection (1.9μm), and data collection is fast at 70,000 points per second, making the LC15Dx suitable for inspecting complex medical parts.
In conclusion, Mr Lukševičius said: “The Nikon solution gives us in-depth knowledge of what we are manufacturing, as well as an understanding of 3-D printing errors and deviations. As a result, we achieve superior product quality and avoid problems during operations.
“Furthermore, our quality control laboratory often receives inquiries from other manufacturers in the medical sector — and other industries — to perform geometry inspection for them.”