Oxfordshire-based ES Precision Ltd (
www.esprecision.co.uk) is only two years’ old but the three staff that program its eight laser marking workstations have been working with industrial lasers for a long time – about 75 years — enough time to develop a few ‘tricks of the trade’.
ES’s business is a jobshop – sub-contract laser marking of components or finished goods on behalf of its customers.
It has tested out hundreds of different materials; metals, plastics, coated products, ceramics, wood, leather, etc.
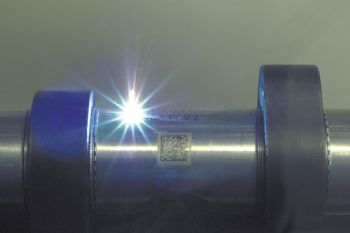
ES Precision can mark tiny ID matrices and alphanumerics barely visible to the eye, cut and mark tamper-evident labels and produce scales and etch other functional marks on medical devices and automotive parts.
Laser marks are permanent, high-resolution and can have excellent contrast.
The way the laser interacts with materials can be in many different ways: metals such as stainless steel can be engraved with depth but little contrast or can be annealed to generate a smooth, black oxidised surface mark.
Plastics can be carbonised (dark mark) or foamed (white mark).
Coated materials such as back-illuminated car dash switchgear or laminated labels show the layer below after the top layer is cleanly ablated.
The action of the laser, delivered at high speed by galvo mirrors, depends not only on the material but also on the characteristics of the laser selected.
Lasers commonly used in laser marking and engraving applications can be solid state (Nd:YAG, fibre; Vanadate) or gas (CO
2).
Most operate in the invisible infrared part of the spectrum but some can be frequency-doubled or even tripled to generate laser pulses in the green or UV part of the spectrum.
Choice of the best laser for a task is critical for optimisation of results.
Some of the main characteristics are intrinsic to the type of laser source to be used – generally the wavelength and maximum power available for example. Other parameters will be programmable during testing – perhaps the peak power, Q-switch frequency, galvo speed, etc.
Whether you want to get the most out of a laser you already have or are considering buying a new laser for a particular task, these tips might help you to improve the results you get.
1.
Focus, focus, focus The laser will usually give the crispest, cleanest results only when perfectly in focus and the tolerance to getting this wrong (‘depth of focus’) can be as little as 1mm. Double-check the laser is properly in focus if you are unhappy with your results.
2.
Select the right lens for the task It is tempting to use a large marking field – why not take a lens so that you can mark anywhere over a larger area? In addition, a larger lens gives the user a bigger depth of focus (see tip 1) – what’s not to like? The reason is down to basic optics: doubling focal length of the lens doubles the field dimension but it also doubles the focus diameter of the spot. For a pulsed laser that will mean that each pulse only has one quarter of the peak power density. That can easily make the difference between an acceptable result and an unacceptable one.
3.
Mark a matrix to vary one parameter against another to efficiently test material response to the chosen laser Several different test matrices can be created but one that is particularly useful is to vary pulse- or Q-switch frequency against laser power – see figure 1 for an example on stainless steel.
4.
Faster marking can be better – two or more passes, sometimes each with different parameters can yield better results than a single slower pass in the same total mark time. Deeper marks can be produced with many repeated rapid passes – erosion engraving – rather than one slow, thermally-damaging pass. Another trick useful when good contrast is essential, for example when marking a barcode onto bare metal, is to etch the whole region of the code with a mark to lighten up the metal and then mark the dark bars on top.
5.
Try out as many different laser types as possibleES has five laser types – Nd:YAG, Vanadate, Fibre, CO2 and frequency-tripled Vanadate. We therefore can choose from a wavelength range of 355nm to 10,600nm and outputs which are continuous wave or pulsed or Q-switched.
ES Precision regularly surprises customers with what it achieve after they advised that they’d tried laser marking and “it didn’t work”. Not all lasers are equal!
ES is happy to test mark customer parts – it can import graphics, such as a logo or functional layout; it can mark bar codes; and it can create unique incrementing serial numbers.