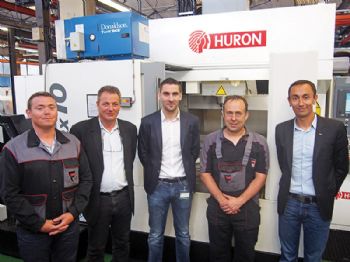
For the last three years, a Huron machining centre at Forges de Courcelles (
www.forges-courcelles.fr) has been using machine-based measuring technology to reduce lead times and optimise its precision machining of crankshaft tooling.
The company is benefitting from the upturn in the automotive market, which accounts for 95% of its turnover (the remaining 5% is with the heavy vehicle and truck sector).
Regis Varney, head of Forges de Courcelles’ tool shop, says: “While we produce steering boxes, shifting forks, drive shafts, chassis components such as kingpins for cars and triangular control arms for trucks, a large part of our production is crankshafts. Our output of these has risen dramatically, following the introduction of direct-injection diesel engines.”
With over 470 staff and a turnover of 116.6 million euros, the company has maintained its position as a European market leader in the production of crankshafts, making some 3 million annually. To achieve this output, it is using modern machining centres to produce and maintain up to 20 dies a day.
The tool shop consists largely of horizontal machining centres with pallet-changing devices that allow quick change-over times. The shop also includes a cell with three Makino A88 machining centres, each equipped with 13 pallets; there is also a robot-welding station.
To further modernise its production resources to meet increasing demand, Forges de Courcelles recently installed a Huron K2X10 vertical machining centre. This was supplied with a laser-based system for tool measurement and a touch probe for workpiece measurement — both from Blum Novotest (
www.blum-novotest.com).
Guillaume Thenon, former head of Blum-Novotest in France, said: “Time is always of great significance, and this is where the Blum Novotest touch probes are of benefit. After placing the workpiece on the magnetic fixture plate, all the user needs to do is start the measuring cycle.
"The touch probe measures the workpiece and quickly acquires the workpiece zero point. Moreover, the opto-electronic measuring mechanism developed by Blum Novotest allows a high probing speed — up to 2m/min is possible with the TC52 — and it offers a higher accuracy than most other touch probes.
"Using the probe in conjunction with Blum’s FormControl software, users can recognise errors in the machining process and rework the part in its original clamping.”
Meanwhile, the Blum MicroCompact NT laser-based tool-measuring system in the Huron machine allows tools to be measured at working speed, while taking account of the tool’s ‘chucking situation’ and any thermal expansion of the spindle.
Mr Thenon says: “A finishing tool will run at about 24,000rev/min, while a roughing tool will run at around 2,000rev/min. This difference invariably results in an expansion of the spindle, but thanks to the laser system, any
deviations no longer pose a problem.”
In conclusion, Mr Varney says: “With the Blum laser system, we can also check the shape of the cutting edge. This allows us to detect even minute errors in the cutting edge before we commence machining. We therefore increase process safety and eliminate the risk of workpieces being damaged or becoming rejects.”