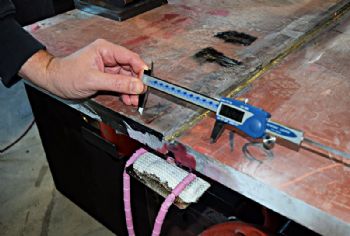
The welding team at the Nuclear AMRC in Sheffield is using Moore & Wright calipers — supplied by the Bowers Group (
www.bowers group.co.uk) — to accurately measure weld shrinkage on nuclear components.
The measurements are carried out as part of Time of Flight Diffraction testing, an advanced non-destructive testing method that is widely used for weld inspection using ultrasonic probes.
John Crossley, non-destructive testing (NDT) technology leader at the Nuclear AMRC, said: “We use the Moore & Wright IP54 water-resistant calipers to measure weld shrinkage because they are the best tools for the job.
'All members of the shopfloor welding team use them on a daily basis when welding; they are easy to use and provide good accuracy.
"We also ensure that the accuracy is maintained by carrying out regular in-house calibration to traceable UKAS standards.”
Weld shrinkage must be carefully monitored and accurately measured, as distortion of a part due to the expansion and contraction of the weld metal has a direct effect on residual stress, which can increase susceptibility to failure through corrosion fatigue, stress corrosion cracking and fracture.
Each measurement is logged by the Nuclear AMRC, and the parameters for tolerances are strictly met.