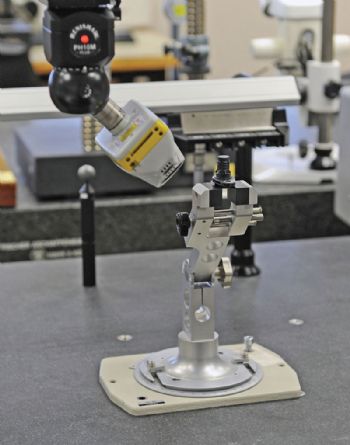
The quality department at the Chassis & Safety division of automotive company Continental — based in Veszprem, Hungary — recently invested in two Nikon Altera multi-sensor co-ordinate measuring machines (CMMs) fitted with LC15Dx laser scanners, to upgrade the inspection capabilities of its measurement laboratory.
The company needed a system capable of rapid inspection cycles combined with fast surface scanning offering accurate feature measurements, the aim being to gain a more comprehensive insight into the company’s products.
Continental Chassis & Safety’s product range includes electronic and hydraulic brake and chassis control systems, wheel and engine speed sensors, airbag electronics and electronic air suspension systems.
Daily tasks in the measurement laboratory include feature and surface inspection, linear dimension measurements and GD&T (geometric dimensioning and tolerancing) analysis, to monitor production quality from the shopfloor and assist in new-product development.
The quality department produces some 1,600 inspection reports a year, each comprising about 20 measured parts, but it needed to gain a quicker and more comprehensive insight of the results — and obtain more information per
report.
In the company’s measurement laboratory, a single CMM with touch probes was handling most of the inspection tasks. Measuring technician Peter Somogyi says the main limitation of this CMM was its slowness, and hence its low capacity.
Quality engineer Tamas Brunner added that the software was not up to the standards required in respect of automated operation and the latest GD&T analysis; he also reckoned that inspection cycle times needed to be halved and that multi-sensor technology should from the basis of the reorganised facilities.
After consulting several CMM vendors, Nikon Metrology (
www.nikonmetrology.com) reseller Vesz-Mont 2000 — also located in Veszprem — suggested that a multi-sensor Altera 8.7.6 CMM would provide the ideal solution.
The decision was made to install two CMMs, each offering multi-sensor technology with Nikon’s most accurate digital laser scanner, LC15D¥, complemented by Camio software.
Mr Somogyi and Mr Brunner both emphasised that the high accuracy of the LC15Dx (1.9µm) was the main deciding factor in choosing the Nikon equipment. Meanwhile, Enhanced Sensor Performance (ESP3) eliminates the need for component preparation, such as powder spraying of dark or multi-coloured plastic parts, while the specially developed Nikon lens provides sharp detail, allowing shapes, edges and features to be measured.
The new CMMs also include a TP200 tactile measuring probe, while a Renishaw ACR3 change rack ensures smooth, automated exchange between tactile and non-contact probes. Nikon’s Camio software undertakes data acquisition and processing.
As all measurement data is stored and available for reprocessing or further analysis, the new inspection system serves as an important tool in handling potential customer claims. The quality of the new inspection process has given more detail relating to critical dimensions, cavities and functional features of parts, allowing faster corrective action to be taken.
Mr Somogyi says: “The multi-sensor CMM allows almost all types of measurements to be completed on one machine, whereas previously we needed to use multiple inspection facilities such as tactile probe, microscope, projector and Conturograph. Moreover, the graphical reporting is quick and easy to understand. Parts need to comply to many different tolerances, and the reports provide clear information.”
Since the two multi-sensor CMMs were installed in the quality department, they have provoked interest from Continental’s Moulding Competence Centre, which is evaluating how optical inspection can speed pre-production and development cycles.