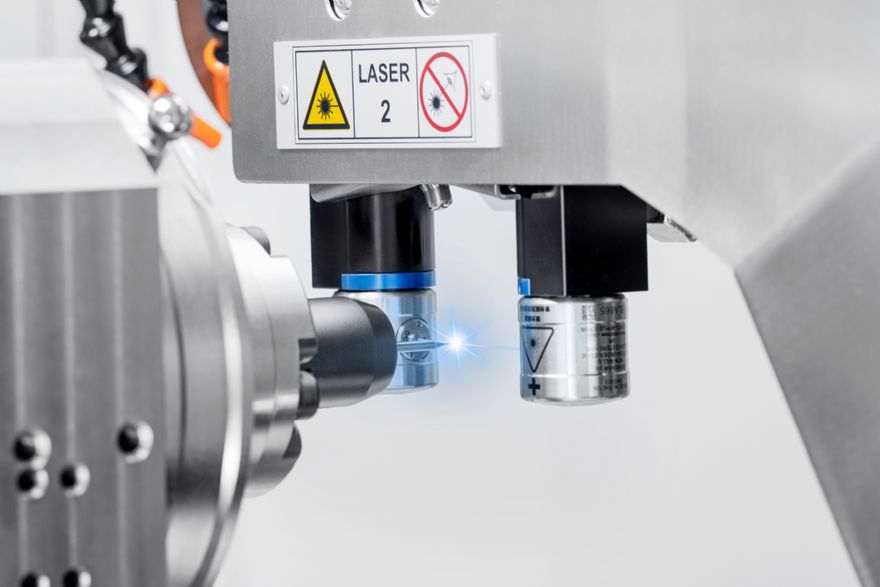
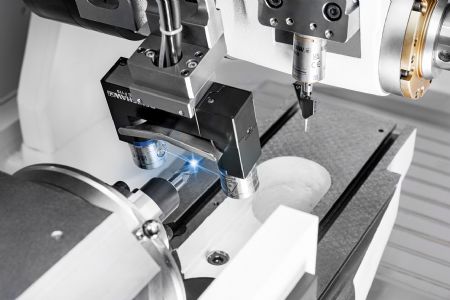
 Walter Laser Contour Check option on a Walter Helitronic Micro tool grinding machineWalter Ewag UK
 has announced that the
United Grinding stand at
EMO Hannover 2023, taking place 18-23 September (Hall 11, Stand E34) will host a selection of Walter machines and technologies for more effective and efficient tool and insert grinding and erosion, with parent group United Grinding’s revolutionary C.O.R.E. (Customer Oriented REvolution) hardware and software architecture and Walter’s innovative Laser Contour Check non-contact tool measurement development in the spotlight.
Laser Contour Check is now optional on all Walter Helitronic tool grinding and erosion machines, and ensures high-precision and fast in-process measurement of tool parameters using blue laser technology in conjunction with intelligent measuring to measure various features on cylindrical tools from 1 to 52mm diameter — any deviations are compensated for directly during the machining process.
Laser Contour Check’s analogue laser beam measures a tool’s entire contour rather than measuring at specific points as with tactile or digital methods. Laser technology also avoids possible damage to the tool’s cutting edges as well as measuring errors that could occur due to probe tip wear during tactile measuring routines. The measuring system can be integrated directly into the machine’s working area and moves into position when required.
Both C.O.R.E and Laser Contour Check will be demonstrated at
EMO on Walter’s Helitronic Mini Plus and Helitronic Micro tool grinders; the former for producing tools of 1-16mm diameter and up to 255mm long, and regrinding tools of 3-100mm diameter; the latter machine for processing tools from 0.1-12.7mm diameter and 220mm long.
‘High-end’ tool grinderHelitronic Mini Plus can be supplied by Walter Ewag UK as a cost-effective ‘basic’ machine or as a fully automated model. The basic version can be configured with a wide range of efficiency options and various loading systems, effectively extending it to a fully equipped ‘high-end’ tool grinder capable of all current and future applications in the small and medium tool diameter range.
Also on display will be the Walter Helitronic G 200 tool grinder which, with a maximum grinding wheel diameter of 150mm, can process tools of 1-125mm diameter and up to 235mm long.
Alongside these at the show will be the two-in-one — grinding and erosion — Helitronic Vision Diamond 400 L for tools of 3-315mm diameter and up to 420mm long, and this will feature a Robot Loader 25. The loader adds a new level of automation by permitting enhanced levels of unattended production. The loader can accommodate 21 tools of up to 315mm diameter and weighing 20kgs (or 28 tools of up to 220mm diameter; 70 tools up to 105mm diameter).
 Walter Laser Contour Check option on a Helitronic Mini Plus
Insert grinding is the forte of Walter‘s six-axis Compact Line which is designed for processing (including peripheral grinding) inserts of tungsten carbide, cermet, ceramic, PCBN and PCD, and a particular feature is the application of protective chamfers on inserts main cutting edges.
The machine also has a ‘three-in-one’ dressing unit that ensures grinding wheel concentricity and high process reproducibility, plus it offers wheel dressing, regeneration and ‘crushing’ in a single package. Walter’s tool measurement expertise will be highlighted by the Helicheck Nano – the world’s first automated measuring machine for ‘micro’ and ‘nano’ tools as small as 0.1mm diameter and standard tools up to 16mm diameter – and the Helicheck Plus with 3-D sensor.
Walter says that the comprehensive measurement of tools with diameters of less than 1mm is usually fraught with problems and that even the use of microscopy sees human operation posing the greatest risk of error.
The Helicheck Nano takes a different approach, however, offering non-destructive and operator-independent reliable measurement of tools using transmitted and reflected light. It is a process made possible by the use of variable optics having up to 800x magnification and, in combination with high-resolution cameras, these microscopic optics are the basis for measurements in the nanoscale.
Robot-loading systemImportantly, the machine offers the possibility of automation with a robot-loading system enabling up to 7,500 tools to be measured without operator intervention. Walter’s 3-D laser sensor heralds a step change in the fully automatic measurement and digitalisation of tools by enabling tool scanning with four-times the resolution than previously possible and the ability to process that data four-times faster.
Ideal for inspecting high-performance tools where cutting edge geometry, pitch and spiral pitch vary widely, the 3-D sensor can replace two separate machines traditionally used for measuring such tools - perhaps a combination of conventional and laser checking.
Easily and quickly programmed using wizard routines, with resulting short set-up times, the 3-D sensor effectively ‘visualises’ the workpiece as a point cloud (in differing formats) and enables various measurements to be undertaken on the three-dimensional image. When the resulting image is ‘placed’ on the tool’s three-dimensional design drawings, or a master part, any deviations can be clearly seen (via the integrated 3-D Viewer) as three-dimensional comparisons of point cloud and target model, including surface reconstruction.
In addition, Walter will also highlight its Helitronic Tool Studio software, and there will be a designated area showcasing customer care services, available to all users of Walter and Ewag machines/technologies, as well as focusing on C.O.R.E. and United Grinding’s Digital Solutions – all designed to maximise users’ productivity and profit levels.